Binary Decompilation
Table of Contents
Disassembly
When approaching pwn challenges, most of them provide a binary, but do not give you the source code or assembly code. How do you tackle such challenges then?
You will now learn disassembly, which allows you to convert a binary back to its assembly code.
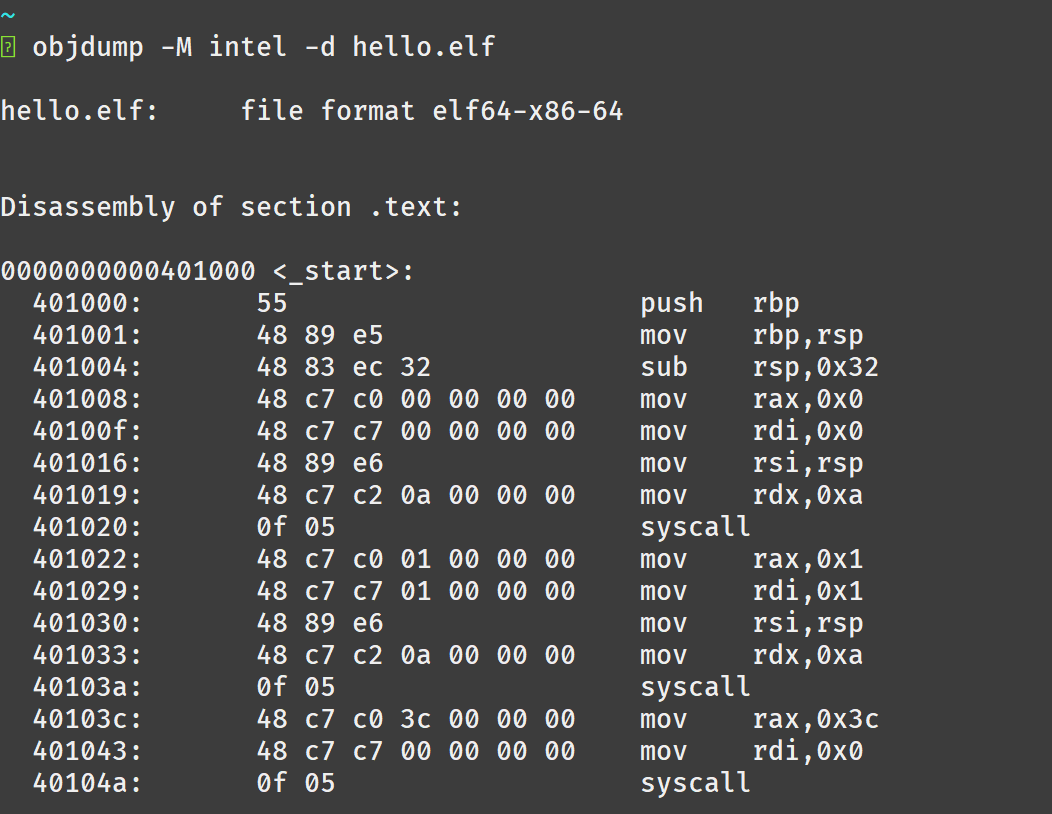
There is a convenient linux command line tool called objdump which allows us to easily convert our C code back to assembly.
We can run objdump with the -d flag which signifies disassemble, and the -M intel to display our instructions in assembly syntax.
if you do not provide -M intel flag, you will see AT&T syntax assembly which is cancer
Decompilation
However, assembly language may not be the easiest to read, especially when its compiled from C program.
Hence, there are decompilers such as IDA and Ghidra, which is able to convert a Binary back into what it thinks the C code looks like.
Decompiling the C program we wrote earlier:
#include <stdio.h>

int main() {
    char name[10];

    puts("What is your name?");
    scanf("%10s", &name);
    printf("Hello %s", &name);
    return 0;
}
Ghidra:
Opening the binary in Ghidra, we get the following Window
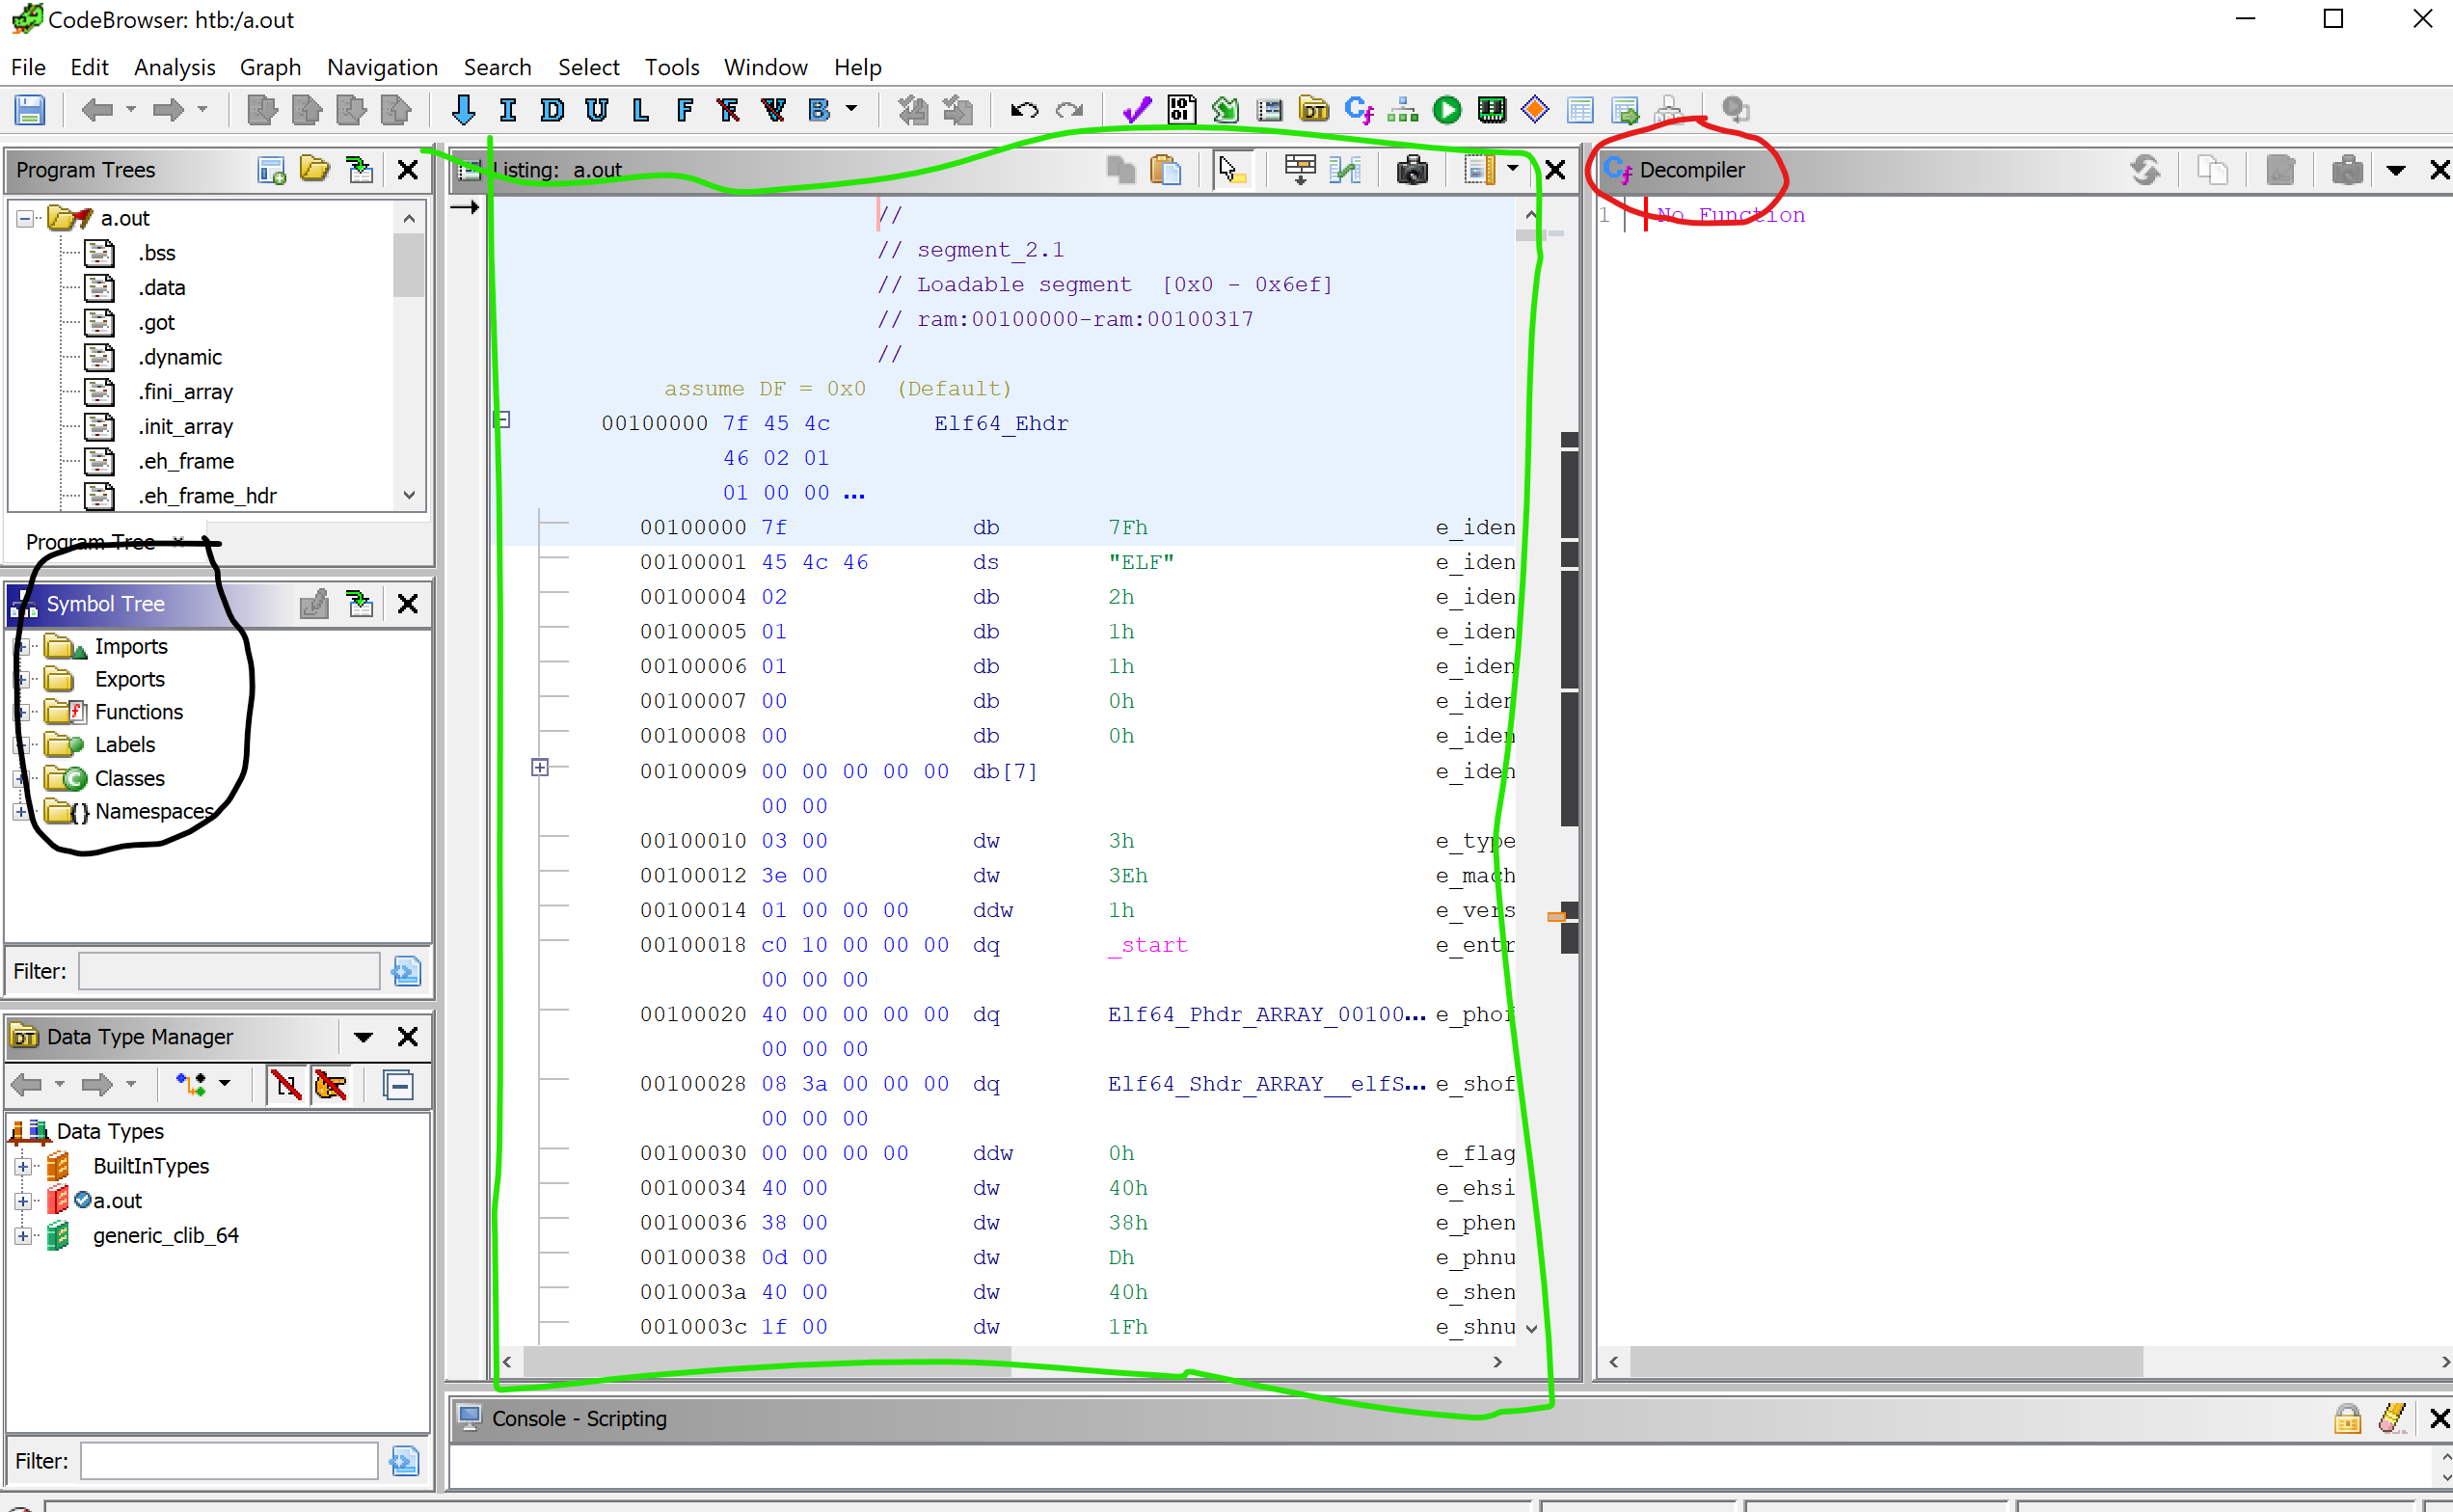
The section circled in black is our Symbol Tree. It contains our functions such as main.
The section circled in green contains our disassembly.
The box on the red circled in Red is where our C pseudocode is after decompilation.
We will have to click on our main function for it to decompile.
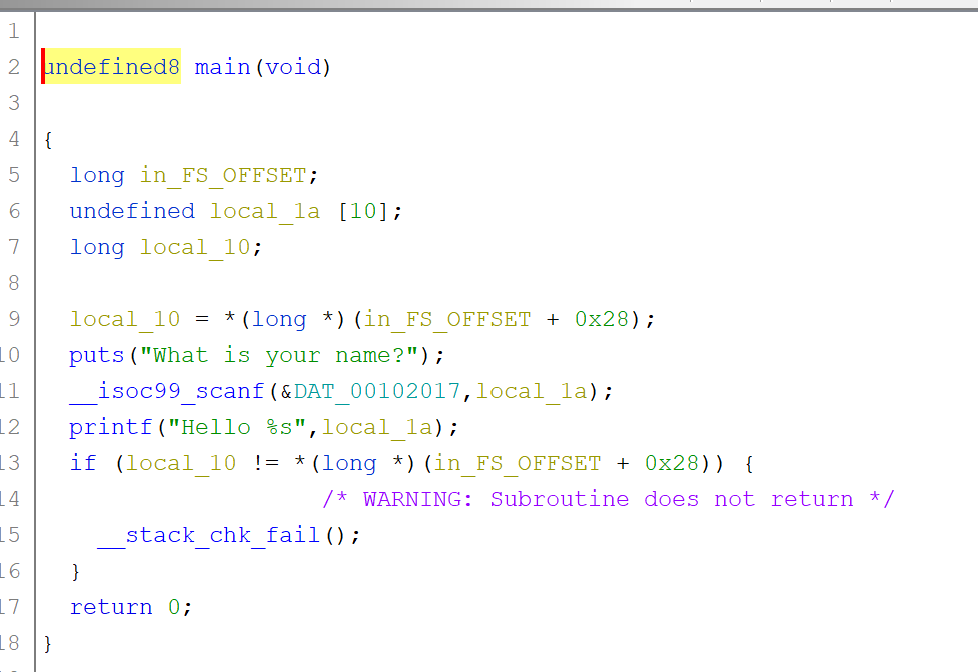
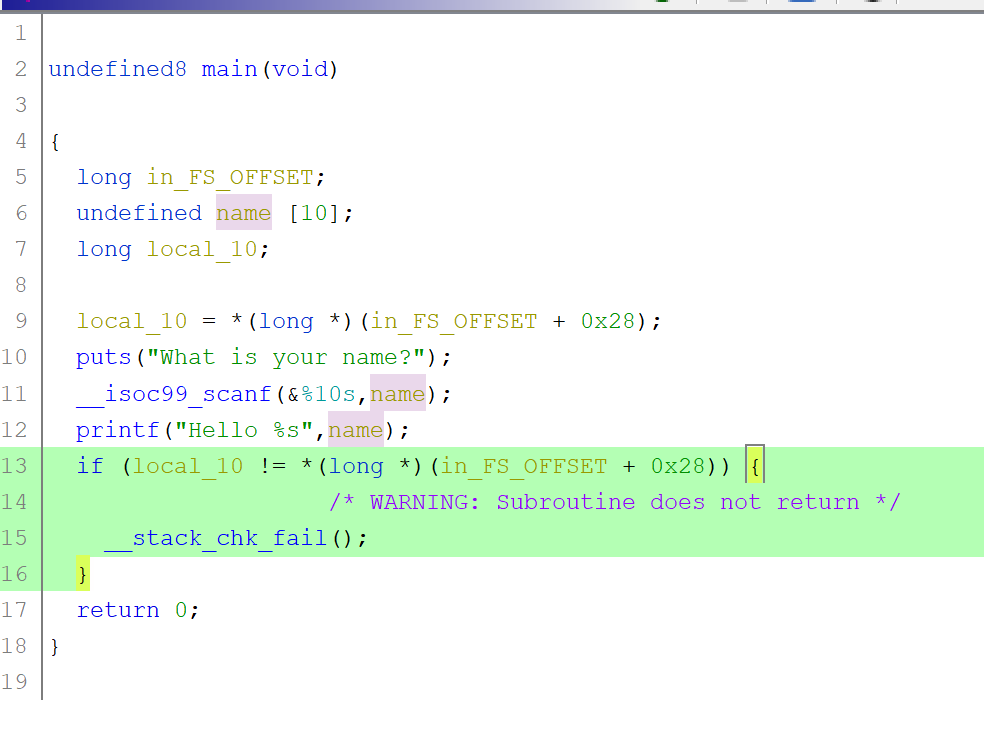
Even though the naming conventions aren’t that nice, we can easily rename the variables ourselves to have ourselves a nicer decompiled code.
you can safely ignore the part highlighted in green. it is the stack canary which we will cover in a later chapter
As you can see we have ourselves a pretty nice decompilation!!
comments powered by Disqus